Monday, March 23, 2015

Using a Brayer

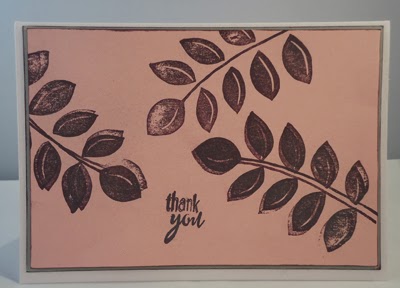
What fun!  A simple and effective way to add colour to your embossed cards.  I have read of some people inking their embossing folders before they put them through the machine, however I have found this a much easier way.

Emboss your card, as normal and then ink up your brayer on your stamp pad .... and just roll it over the embossed surface


When you colour them, like this, there is little need for any further embellishments.  These were all originally embossed on white card stock and the colour is from the inks.  I am going to try one in the new Kaleidacolor Ink Pad to see the results.  This is a multi-coloured pad, so should be interesting.

This next card is one I made for a friend, lovely and fresh with the flowers, paper doily and border accent.


I am starting to get a stock of cards now, although I must admit not all of them have verses in the centre yet.  Must do that, so that they are ready for giving at any time.

Judy

Sunday, March 22, 2015

Little Owls

These little owls have been made in preparation for the next Red Carpet Market Day which is scheduled for Saturday 18th April, in the middle of school holidays.


They are only about 3" tall and can be placed in any random area.  Filled with teddy bear pellets they are very malleable.  The eyes were all sewn on by hand, and let me tell you, trying to cut out tiny circles in felt is rather difficult.  I know there must be a machine available, but I do not have one (yet)

A little close-up of three of the owls


Oh, so cute

Judy


Thursday, March 19, 2015

Sue's card

Here is the card that I made for my sister Sue's birthday.


I really liked the colours and the simplicity of the card with using just a few elements. 

I started out with a Kraft card base, lined that with chocolate card stock.  To this I added a aged printed piece of vintage music.  The vintage lace was a lovely find at the local op shop.  The flowers are in two parts, the back section is hand gathered tea stained lace, which when I first tried on the card was too stark, so I added a hessian / burlap centre, much better.  The Happy Birthday stamp (freebie with a Card magazine) was stamped onto fawn coloured card stock with the Momento Toffee Crunch ink pad.  A small chocolate brown chiffon ribbon completes the card.

I had a one little flower left over, so I added it to the gift wrapping on her present.  As you can see, I kept it all in theme.


Looking at the next photo, I could have done more with the outside of the envelope for the card ...  I must admit, all I did was add a little strip of music washi tape across the corner.  


I am now working on some little owls for a market, so will show you the results when finished. 

Judy

Stamping Techniques

I have not had a lot of time to "play" lately, but when I do, I have been playing with different stamping techniques for my cards.  Now I am going to show you the good, bad and ugly, but it is all a learning curve, and I must admit a lot of fun.

Painters Tape
The first one uses painters tape to get the background, just place your strip of painters tape on the stamp pad, rub lightly and then place on your card stock.  Easy but effective


Washi Tape
The next one was OK, I tried to weave the washi tape for a different effect, which is good, although I will need to ensure the lines are straight in future.  More ink was needed on the stamp to ensure a good crisp image.


Perfect Pearls Powder
This one, I used a VersaMagic ink in Eggplant and then brushed Pewter Perfect Pearls over, it does not really show up in the photo, but it gave the leaves a lovely shimmery shine


Reflection
Using just the stamps I had on hand, I tried the technique of stamping on acetate to create a water reflection.  I like how this turned out, and I would like to try it again with a better stamp.


Sanded Embossing
After embossing the card, I lightly sanded the raised surface.  This gives the card a totally different look, nice and weathered!


The last card does not come under the stamping technique umbrella, however it is just another quick and simple card I have made.

Using just a round heart die, with a stamped image, crisp and clean


I have one more card to show you, but will have to post it later tonight.  I have made this one for my sister Sue's birthday, and I will be seeing her tonight to deliver it.  Sue is my card making teacher, so the pressure was on .... but I liked how it turned out, so that is good

Have you had any time for craft, I wish I had more

Until later this evening
Judy

Thursday, March 05, 2015

Finally Ready

The button boards are dusted, the buttons chosen, I am ready!

I have a trade table at the Murrumbidgee Country Quilters Quilt Exhibition at Griffith this weekend. It is always a dilemma trying to decide which items to take, however I am fortunate to live close enough that I can come home each evening, and restock if necessary.

Tomorrow is "setup" day, so a big day planned.  The quilters will be hanging their quilts and I will be trying to stay out of the way, while I set up my own display.

Details of the exhibition are as follows, taken from Griffith City Council's Events Calendar

Murrumbidgee Country Quilters Exhibition

The popular Bi-annual quilt exhibition hosted by the Murrumbidgee Country Quilters will showcase the talents of local fabric artists. Light refreshments including morning and afternoon tea will be available, along with patchwork products made by the members of the group. Local patchwork and craft suppliers will also be trading during the exhibition. The magnificent quilt raffle will be drawn on the day. Proceeds of the event will go to Post School Options.


Venue:    St Mary's Hall, Edon St, Yoogali via Griffith
Date:      Saturday 7th March & Sunday 8th March 2015
Tine:       9:30 am - 5:00 pm
Cost:       $5.00 entry
Contact:  Karen 6962 6960  or Annette  6962 5308

Hope to see you there
Judy

Wednesday, March 04, 2015

Another member of the family

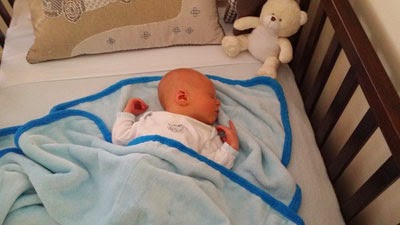
Our family has increased with the arrival of my Great Nephew Finn Lucas Lonergan


He is the first child for my niece Kate and her husband Matt, and also the first grandchild for my sister Sue and her husband Wayne.  So a lot of firsts.  I may be biased, but he looks so cute, I hope it will not be too long before I see him in person.  

Another photo, his first sleep in his own bed ..


Still no craft, but exciting news on the online store.  I am now stocking new product ranges for cardmakers, scrapbookers and stampers.  Pop across and look at all the new products here.

Have fun
Judy

Tuesday, February 24, 2015

Babysitting

I have been busy babysitting various animals/pets lately as well as looking after gardens in the hot summer, therefore not much (or not any) craft time.

These lovely brown hens are waiting for me every morning to let them out - 9 in total.  They are great layers, and one of the benefits of caring for them is fresh eggs!


Then these cute little silkie hens, one mother hen and three chicks, although the chicks are growing quickly.


Next comes the blue budgerigar, I must admit he is a favourite, although he is a little cranky.  Not sure of his age, but he loves his apple treat each morning.


Then the cockatiel, he did not want to have his photo taken this morning, fluffed up his feathers as if to say, "get out of here"!


He loves to be hand fed sunflower seeds, and gives me a "wolf whistle" every now and then.  Good for the ego!

Now for a funny sight this morning, when I went out to change my dogs water, a little frog was taking a swim.  I do not know where he come from, but he was set free in the garden


He is a little hard to see in the dirty bowl, and it was only 6:00 am, but it was such a surprise I had to get my camera.

I will be having a trade table at the Murrumbidgee Quilters Exhibition at Griffith on Saturday and Sunday 7th and 8th March, so if you are in the area, come and check out all the great quilts as well as saying Hi!

Until then
Judy

Sunday, February 08, 2015

Stamping

With a new stamp set (Serene Silhouettes) from "Stampin-Up" I have made the following cards, just using the stamps.


This next card, is a favourite using the Lotus Flower stamp, it was impossible to photograph, because it was so pale, but I hope you can see it.    The actual flower component of this stamp is made up of three stamps, so you can get great detail


I think my next investment will need to be some stamps with sentiments, I have so few.  If anyone can recommend some, it would be appreciated.

Until next time
Judy

Saturday, February 07, 2015

Little Wallets - Finished

These little wallets have been waiting for weeks to have the stud closures installed... for about 15 minutes work, they are completed


It is so long since I have done any sewing, although that is about to change as my little craft group are meeting for the first time in 2015 on Monday night.  Would you believe it, we are going to be making more of these little wallets.  I think I will prepare some bright and colourful fun fabric for the next lot

My card making adventure is continuing, lots of new toys to play with.   Starting with this one, a Brayer ... fun!  Wait until I show you the results


Bye for now
Judy


Tuesday, January 27, 2015

Washi Tape Cards

Friends have been playing with washi tape on their cards, so my sister Sue and I decided to have a go.

Both these ideas came from photos on the Internet, but when you use your own colours etc, they look entirely different.

Card 1 - Washi Tree

A very simple card, I cut out the triangle tree shape from card stock, and just wrapped it with various strips of washi tape.  Love the little robin strip.    Mounted it on an embossed Kraft card, and added a sentiment.  Finished off with a little paper twine down one side.   Do you like the lace trunk of the tree?


Card 2 - Birthday card.

This is a great way to use up scraps of washi tape, just pick 4 - 6 different tapes, and tear strips off and place "any which way" onto your card mount.  Finish off with a flower and sentiment.  You could add anything to this card, but I thought the background was busy enough, that this was sufficient.


Until next time
Judy


Monday, January 26, 2015

Happy Australia Day

It is Australia Day today, January 26th, and I usually create something to reflect our country.  This year I went away for the long weekend to visit family, and did not get a chance to make anything specific.  I did have these journal cards ready to make a card, which I will do sometime in the future.


The latest cards I have made, were based on a little clip art that my niece messaged to me.  It was so sweet, I saved the image and made it into two cards, each a little different.

The first card, was mounted on a red polka dot card, which looked great


The second card, was mounted on white card with a black polka dot washi tape behind the off angled mounts


I will be sending the top card back to my niece, I think she will be surprised, but these would also be great for Valentines Day, which is not very far away.

Did you have a great weekend?

Judy

Friday, January 23, 2015

Getting adventurous

I am really starting to get the feel of this card making business, and have started taking some crafty risks and trying new things ....

Brown Birdie Card

I ran my Tim Holtz Distressed Tea Stain Ink Pad over the embossing on this card - it gave a nice antique effect as the embossing was on kraft card.


I then wrapped a little paper twine around the card and glued a lovely wooden bird button from "Up In Annie's Room" (which is available from my on-line store,see here)  for the dimensional look. 

Floral Tag card

I left the round aluminium tag hanging free on this card, which gives it an interesting look.  Onto the tag I glued a card stock flower (I have used these previously on my large paper-clip bookmarks)


I like the pink accent colour on this card.

Last one for today, a simple little butterfly card, the butterfly is dimensional which you cannot really see in this photo.  A pack of 6-8 butterflies in a pack for $2.00 - great price from the discount store.  I think the layout of this card, in softer tones would make a nice sympathy card.


Guess what I am going to try next? Cutting out shapes using die sets on my Cuttlebug - not sure exactly what that involves but another lesson is scheduled with my sister.  

Judy

Thursday, January 22, 2015

I'm Having Fun

I am really having fun making these cards - I can sit at the dining room table and play without having to go to the craft studio and face the mess in there ... he he

Two more Christmas cards to show you today, one using tree buttons from my store, see here to purchase, and the other trying the Santa stamp again,


I like the embossing on the background of this card, seems to give it a snow-like effect.  I do not have a snowflake embossing folder (yet)

Using the Santa Stamp


A few more layers in this card than the original one (see here) ...  I photocopied a section of a book about Santa for the background, and the black frame was a purchased felt frame  - this was also the first time I have incorporated brads on a card ... see I am trying something different all the time.

This is getting addictive

Judy

Wednesday, January 21, 2015

No sewing - More cards

I know, I know, finish off the wallets - but these cards are so cute?

A little folded doily makes a cute dress on this card ... instructions can be found here  on how to make the dress


The green background paper really makes the dress pop

The next card has become a favourite, love how it turned out. 


The Robin is a Mulberry paper die cut which is available in my on-line store - a pack of 5 for just $2.70.  It really is the show-stopper element of this card.  A little greenery wrapped with a red & white ribbon - all complete.  I am really pleased with the end result 

I will be ready for next Christmas before I know it, if I continue making all these cards.  That would be a first, being ready that is ....

Judy

Tuesday, January 20, 2015

Playing on my own

I have continued to play with my new card making craft - using lots of different embellishments and papers that I had on hand.

This yellow bird card, was just a lovely piece of cardstock that I had depicting the birds.  I think this card could be used for many occasions.


The next card was a simple card, using a Martha Stewart snowflake punch.  Using a dark blue card as the background, I just punched snowflakes down one side on white card stock.  Spotted ribbon, and all finished for a lovely fresh look.


I am enjoying this challenge of trying a new craft - you will see more cards in the future, although to be truthful, I have 6 little wallets waiting to be completed.  Four just need to have the stud closures installed - probably 30 minutes work.  This week!


Judy

Monday, January 19, 2015

Card 6 - Using Tags

Well, I wish I could say I got better as the card making day went on, but this was not the case.  My last card, lacks punch - looking back you can see where you would have changed it, and that is a good thing, right?

Card 6 - Using computer printed tag and sentiment


Sue - placed a coloured rub-on, on a rusty tag for the feature of this card.  Lots of different elements to keep the card interesting.  This is where I do not do enough!


This shows the final cards from our card making day a week ago, however I will be making more.  I have so many items that can be used for card making, and it is quick and easy as well as a useful craft to participate in.

Last night, I saw the idea for a pleated dress on a card, so I had a go .... just using what I had on hand, and I am pleased with the result


I am not sure how this card is supposed to fit into a envelope, but I love how it turned out.  I may try another one, but making the dress a little smaller.  Notice the cute bow?  I used another new technique for tying the bow, using a fork.  Check out how on the internet, you will be surprised how simple it is, and how easy to get a tiny bow.

Am I hooked on card making, not completely, but at least I am crafting as my sewing mo-jo had gone missing

Until next time
Judy

Sunday, January 18, 2015

Card 5 - Stamping and Using Embellishments

The last couple of cards from the card making day last Sunday are entirely different, we both went off on individual tangents.

I wanted to try stamping all over a card to see the effect - and I must admit I love the end result.
Using another stamp from the Darkroom Door Yuletide set, I used a pewter stamp and went to town. A little sentiment in the corner and the job was done.


Sue's card - in this example she was showing me how to use embellishments and paper to get a great effect.  She used Kaisercraft Basecoat Christmas Journal Cards on the following card


These cards are great as they are double sided, and are small enough to use without any trimming.

Judy

Saturday, January 17, 2015

Card 4 - Santa Stamp

The time had come to start playing with stamps on our Card Making day.  This Santa stamp is one of the Darkroom Door Yuletide set - it  is a recessed type of stamp, and has great detail.  We also used the "Tis the Season" stamp as well


My card  - I think it needs a ribbon or something down the left hand side, what do you think?


Sue's card - the wider mounting card makes the stamp stand out more.  The little burlap Noel star was purchased from Spotlight


Only two more cards to show you from our card making day.  Can you see any improvements?

Judy