Saturday, September 03, 2011

New Tissue Cover

As mentioned in my previous post - I have been making changes to the little tissue cover that I make for the Breast Cancer Drain Bags as well as the Pink Ribbon Bon Bon gifts.

I have reduced the steps required, yes I am lazy, however I am always looking at a easier way to do things, especially when I am making a lot of them ....

OK - instructions and lots of photos

Cut your outside fabric 5 1/8" x 6 1/2"
Cut your lining fabric    5 1/8" x 7 1/2"


With right sides together, sew down one 5 1/8" side with 1/4" seam


Bring fabric across to the other side, so both ends meet, and sew with 1/4" seam. (Notice how it will bunch up, because the fabric is not the same size)


Iron both seams open


Turn right side out.  With the outside fabric facing up and making sure that you have equal amount of the lining showing on each side, iron flat.  I do not measure, just guess by sight.
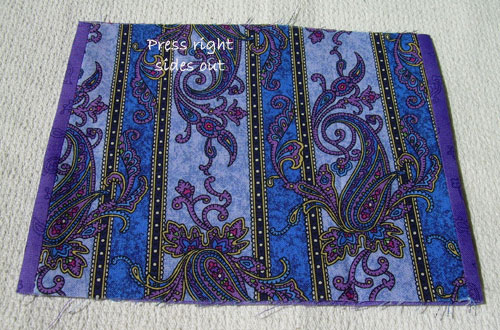


With the outside fabric facing, fold the short sides together - iron.  This will give you a fold in the centre. 


Open back out, Photo shows fold marked in red (so you can see it)


Take each of the short sides, and fold into the centre.  Take care that you have the outside fabric on the inside.  Press.


Nearly finished.  With a 1/4" seam, sew both the open short sides.  Do not forget to back stitch at both ends, and I also like to reverse over the centre join for added strength


Clip seams, angled close to the ends, so that we do not have bulk in the corners, when we turn it through


Turn right side out.  I use a knitting needle to ensure that my corners are turned out nicely.


With tissues added


and with 30 minutes sewing, you can have all these


If you find any errors in these instructions, please let me know so that I can fix them

Have fun, making these handy little gifts

Judy


Thursday, September 01, 2011

Cute find

Sometimes you find the cutest little things ... take these sock coin purses.  How cute are they?  All lined, with a key ring attachment, brand new for just $2.50 each.

You would not be able to make them, for this price ....


I have been making more tissue covers, and have been experimenting with the pattern.  Will share my changes with you in the next couple of days.  We have a tissue cover in each of the fabric bon bons, so I am still on target with getting all these completed this week.


Wednesday, August 31, 2011

Better ...

The pink ribbon bookmarks look much better now that they are presented on white tags.  The bakers twine idea did not work, however my snowflake Japanese Masking Tape did the trick.

Do you think they look better now?


Judy

Tuesday, August 30, 2011

Small steps

I am taking small steps this week.  I have:

1. Updated my online store with new buttons
2. Printed out some pink ribbon graphics onto Magnetic Paper for little fridge magnets.  I just need to cut them out.  This is very easy with just a pair of paper scissors
3. Finished the pink ribbon bookmarks
4. Finished one more fabric bon bon, however I have another two cut out


Magnets waiting to be cut out


Bookmarks

I think I will change the business cards to just white tags, with pink & white bakers twine ... will change that this evening and post another photo tomorrow 

Judy

Monday, August 29, 2011

Organised Chaos

I have a busy week planned, with no new craft projects scheduled.  Only four weeks until I have to have all the Pink Ribbon table gifts completed.  Still 10 fabric Bon Bons to sew, and I have started experimenting/putting together the little gifts to place inside the bon bon.  Still needs some work, however a start is good!

The mess ...


Trial run of bon bon gifts, it still needs something, not sure exactly what at the moment?  I have some pink ribbon charms on their way from the USA and I am also going to make some pink ribbon paperclip bookmarks with buttons that are available in store.  Most the the graphics used for the little gifts were either purchased or available free online.


I also received a shipment of buttons from the USA with new Christmas 2011 packs.  These need to be uploaded to the store soon, to enable my customers to start on their Christmas projects.  I found it interesting that the majority of the new packs have pastel themes.  I am a traditional girl(?) when it comes to Christmas, love the reds and greens.


Click to enlarge the photo

Love the new pack of candy cane buttons (bottom row) - one pack of those will be staying with me, he he

Keep your fingers crossed, that I have a productive week, and that I can complete the pink ribbons gifts.

Judy


Sunday, August 28, 2011

Tissue Covers with a Difference

I have started to combine the printing on fabric crafts with little gifts.  The Internet has provided so many free scrapbook phrases that I thought it would be good to use these in some way.

Therefore I printed some phrases onto fabric and incorporated them into the little tissue covers.  Now you have something practical as well as being motivated / reminded every time you use it.  This is just the start of another venture for me ..

Two little tissue covers, showing the front


Now the back, with printed phrases


Group photo, showing two others made with Christmas fabric


Judy

Saturday, August 27, 2011

Snowman Mania

I do not know why, when the sun is shining that I seem to be obsessed with snowmen.  I love the simplicity of them, their nice clean lines.

The following tags were made from old business cards, with blue paper glued to the front, and the edges dusted with sparkly snow flurries.  Three white buttons form the snowman, a little scrap of black felt for his hat, and bakers twine for his scarf. 

Now I need your help before I make more, do you like the tag with twigs arms drawn or not?


Next I used some paper tags with aluminium rims to paint some snowman faces.  I really liked how these ones turned out


Last, but not least, I have been using snowman buttons on jumbo paperclips for bookmarks.  Really sweet!


Do you ever get a craze on one thing, and it takes over your creativity for awhile?

Judy

Friday, August 26, 2011

Standing Santa and Mrs Claus

Even though my friend Colleen has returned home, these are her creations.  Mr and Mrs Claus, they are free standing with wooden legs and feet.


Closeup of their faces


Mr Claus with his wooden toy, and "big"  belly.  I love his coat!


Mrs Claus with her lacy apron, check out her bonnet!


They are such a cute couple and have found a home with my sister.  I had better make a set for myself!

Have you started on your Christmas sewing yet?  What are you making?

Judy


Thursday, August 25, 2011

Quick and Easy Ornies

These Christmas ornaments (ornies) are very quick and easy.  They are not stuffed or wadded (is there such a word?), just two pieces of fabric sewn together.  They will look lovely on the Christmas tree or used as a tag on a gift.  You can decorate any way you like.  I love to use the many gorgeous Christmas buttons that are available ...

The beards are made from bumpy wool, with the actual bumps creating the beard length.  Each ornie has a jingle bell on the tip of his hat.  They are sewn in one piece, turned through and decorated.  Very easy.

Judy


Wednesday, August 24, 2011

New cotton accessory discovered

I am always on the lookout for new ways to store my crafting supplies.  I use perle cotton rather than DMC embroidery thread when stitching faces on my dolls, santas, snowmen etc.

I discovered these new Perle Cotton Bubbles - they allow the cotton to sit in the bubble which has a hole drilled in the clear top for the thread to travel through.   This keeps the cotton clean and safe while I use it, as well as keeping all my balls of cotton from becoming tangled up.


These are available in store for $1.50 each

Tuesday, August 23, 2011

Christmas is flying by

Even though I am talking about the new Christmas projects that I have completed, this could also mean "How Fast Christmas is Approaching".  I am glad I have had this last week to get a start on my Christmas handmade items for the store.

Three more projects completed today.

A gorgeous blue snowman, holding a battery operated tea light.  I have put some wire in his hat before stuffing and this allows him to be hung just about anywhere.  Put him on your door knob, hang him on a hook, off your curtain rail, just about anywhere


Using the same technique / pattern, two Santas. 

One holding a pipberry and greenery spray with a rusty star.  His beard is made from a piece of fake fur.


The next Santa has a piece of greenery threaded through his hands with Christmas lights dangling down.  This is a little hard to see, because of the garden in the background.


My friend has now gone back to Townsville, so unfortunately I will not be spending every day in the studio, but I hope to have some gingerbread men to share with you soon.They are next on my list of things to make

Judy


Monday, August 22, 2011

Santa with Snowmen

This Santa is in the lovely traditional colours of burgundy and green (my favourite). He has his arms full with two snowmen made from warm & natural.  I love how this fabric gives the snowmen a real fluffy look. In his other arm, is a bunch of greenery and pipberry sprays.  Please ignore the garden hose in the background of the photo, I should of moved it!  He is hanging in a lovely native tea tree in my garden, and as soon as Spring arrives this tree will be full of wonderful small pink flowers.  Not long to wait now?


Closeup of Santa's face.  Look at the rakish tilt to the little snowman's hat!


Closeup of snowmen


Enjoy
Judy

Sunday, August 21, 2011

New Santa - Finished

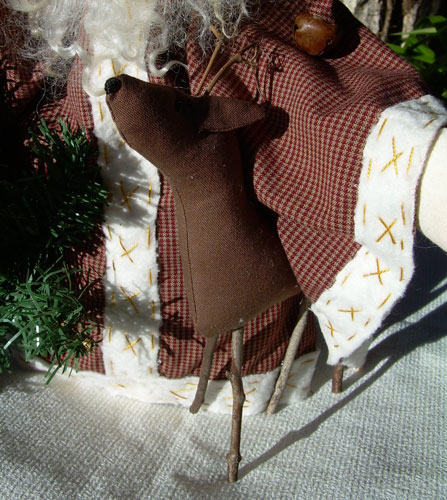
Another Santa has been finished.  This one has a boxed body which allows him to sit very well.  He has "huge" sleeves that wrap around a Christmas tree as well as a reindeer.  I mentioned in yesterday's post how easy these reindeers were to make, therefore I had to be sure and make another one, he he.

Both the tree and reindeer have been glued to Santa, to ensure that they stay together as a group. 


A closeup of Santa's face, showing black button eyes, and a lovely mohair beard.


Can you just see the reindeer, tucked under Santa's arm?


I AM having fun!
Judy

Saturday, August 20, 2011

To All A Goodnight

This is the name of a new pattern from The Olde Country Cupboard.  I had fun making it up today.  I stained a wooden crate that I had on hand to use as the bed.  Santa is sleeping soundly after reviewing his "nice" list.  One of his reindeers look on.  I have put a battery operated light at the base of the bed.  This can be turned on easily by twisting the top of the light.


The toy sack was stencilled with the word TOYS - this was the first time I used the stencil and I am delighted with the results.   The reindeer is freestanding, notice his cute stick legs, so he can be moved around.  Here he is looking at Santa from the base of the bed.


This photo is looking straight down on Santa, and you can see more detail on the reindeers face.


Only two more days before my friend Colleen goes home, and I will need to settle back into normal routine chores, eg NOT spending all my time in the studio.  It has been absolutely fantastic to get so many Christmas projects completed.  We are not finished yet, even though time is running out.

Hope you all have a great crafting weekend, no matter what the weather

Judy