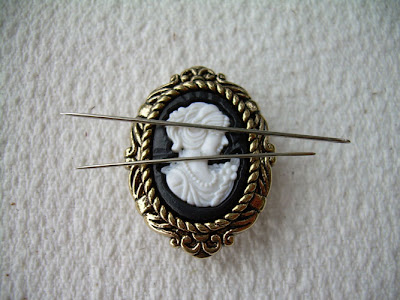
So off I went to make my own Needle Nanny - supplies needed:
- Buttons (or similar)
- Magnets
- Glue
Just cut the backs off the buttons using the shank remover
Place your magnets behind the buttons and check that you have the right side facing the button to ensure that your needle and pins will stick to it - just place a couple of needles on them to be sure before you glue on the magnet on
Glue your magnet on the back, using a strong glue
Allow to dry, and then turn your button over and admire your new Needle Nanny
Test to ensure that your needles stick to the magnetised button
Oh yeah, very cute
Now, I do not need more than one Needle Nanny, so I printed out some Vintage Labels designed by Cathe Holden from Just Something I Made and using double sided tape, stuck the Needle Nanny on these labels. The ones below are made with the new plastic sewing machine buttons just added to my online store, which I thought was appropriate.
The little label I have put on the bottom, reads "Your needles and pins will never go astray, if you have your Needle Nanny handy".
All packed up in cellophane, ready for either gifting or sales
What do you think? Are you going to make some Needle Nannies? These would be a great gift for your sewing group members.
Now, what next on my list of things to try ....hmmmmm
Judy
NB: If you purchase a packet of Nostalgic Treasures (or any other button pack) from my online store to make your Needle Nanny's I will include 6 little magnets .. just put a comment on your order so I will know.


I made several of these about a year & a half ago. Would love to make more, as I am somewhat magnet crazy, but what would I do with them? I already gifted several & still have a few left for me. Don't you just love stuff like this?
ReplyDeleteI just love that Cameo button.....oh yea!! Thanks for linking to my blog for this one Judy, I will acknowledge in my next blog and link people back to this post.
ReplyDeleteCath
@ Bits 'n Bobs