Showing posts with label tutorial. Show all posts

Sunday, January 27, 2013

No-Sew Cushion Cover

This is a quick and easy way to cover a cushion without any sewing at all.  Reminisce of the polar fleece throws of the past, I still love mine.

Insert photo of rug here - I would have, except I realised the rug is in our other vehicle which is in Tumut

Grab your cushion insert and polar fleece


Double your fleece and place cushion on top - this is just to get the measurements.. no need to be too precise, just eye-ball it.  Ensure you leave at least 2.5" extra all the way around


If you like, lightly mark the inside 2.5" with tailors chalk.  Then using your scissors, snip the two layers of fleece with scissors every 1 " - 1.5" to the marked 2.5" line. Again you could use a ruler to gauge where to make the cuts, but I didn't bother.  Snip around all four sides.


Once finished, take one layer of fleece and place on top of the cushion.  You will then have one layer on the bottom and one on the top.


Now, starting at one corner, begin tying square knots between the matching strips on each piece of fleece. To tie a square knot, cross right over left and then left over right.

Quick and easy, soft and cuddly.


 I think I will add this to the list of projects for my nieces and nephews to make. They could easily conquer this technique and each make a cushion for their room.  Would be nice in a printed polar fleece for them.

Judy

Monday, March 19, 2012

Measurements as requested

To all the lovely people that left a comment, in regards to the Emery Board Cover, the measurements follow:

Emery Board Cover ( emery board size 3/4" x 7")

Cut fabric, 14-1/2" x 4".  Fold in half length ways with right sides together.
Sew leaving a 2" gap on side for turning
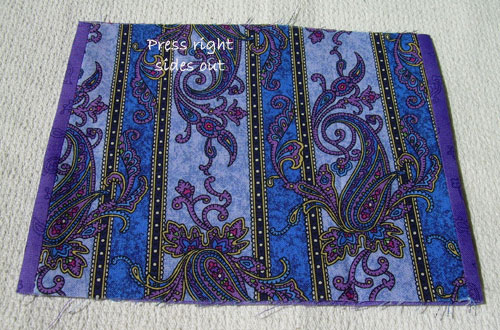
Turn right side out, ensure corners are pushed out, press.
Bring one end up unto 1" from the top - sew each side close to edge.

It's that easy!  But do not hesitate to email me if you have any questions or problems

Tissue Cover

Fabric
Cut 2 x 7-3/4" x 4"
Cut 1 x 10" x 4"

Follow the instructions for the Key Ring Card Holder, just leaving out the step for attaching the keyring. Original instructions are from everything quilts

Very compact tissue cover for your handbag.

Have fun
Judy

Wednesday, January 04, 2012

Looking for pattern or tutorial


I picked up this cute kimono style tissue cover at "The Handy Dog" at Gundagai and I was hoping someone could help me find the pattern or tutorial so that I can make some.

I am starting on my Breast Cancer Drain Bags for the new year, and was donated some Japanese print fabric and I thought these tissue covers would be nice to pop inside the bag.


The tissue cover has a separate piece of fabric across the back, and insert down the centre of the front. You can see this in the photo below.


The other reason I like this cover, is that it holds the top opening tissue packs, which are more readily available in the stores


If anyone can help, I would appreciate it.  I have searched on the web, but cannot find anything similar. 

Thanks
Judy

Friday, September 16, 2011

Pattern for Top Opening Tissue cover

As a request from one of my readers, I have put together a quick little pattern and instructions for the top opening tissue cover.

This is the first time I have tried this method of sharing a pattern, so please let me know if you encounter any problems.
Download the pattern by clicking on either link:

Scribd
http://www.scribd.com/fullscreen/65006199?access_key=key-1y8rq61vppmyzg1jcawo

4Shared
http://www.4shared.com/document/fABwtMwz/65006199-Top-Opening-Tissue-Co.html


I would love to feature your completed tissue covers, so if you make any and wish to share, please email me your photos.


Judy

Saturday, September 03, 2011

New Tissue Cover

As mentioned in my previous post - I have been making changes to the little tissue cover that I make for the Breast Cancer Drain Bags as well as the Pink Ribbon Bon Bon gifts.

I have reduced the steps required, yes I am lazy, however I am always looking at a easier way to do things, especially when I am making a lot of them ....

OK - instructions and lots of photos

Cut your outside fabric 5 1/8" x 6 1/2"
Cut your lining fabric    5 1/8" x 7 1/2"


With right sides together, sew down one 5 1/8" side with 1/4" seam


Bring fabric across to the other side, so both ends meet, and sew with 1/4" seam. (Notice how it will bunch up, because the fabric is not the same size)


Iron both seams open


Turn right side out.  With the outside fabric facing up and making sure that you have equal amount of the lining showing on each side, iron flat.  I do not measure, just guess by sight.


With the outside fabric facing, fold the short sides together - iron.  This will give you a fold in the centre. 


Open back out, Photo shows fold marked in red (so you can see it)


Take each of the short sides, and fold into the centre.  Take care that you have the outside fabric on the inside.  Press.


Nearly finished.  With a 1/4" seam, sew both the open short sides.  Do not forget to back stitch at both ends, and I also like to reverse over the centre join for added strength


Clip seams, angled close to the ends, so that we do not have bulk in the corners, when we turn it through


Turn right side out.  I use a knitting needle to ensure that my corners are turned out nicely.


With tissues added


and with 30 minutes sewing, you can have all these


If you find any errors in these instructions, please let me know so that I can fix them

Have fun, making these handy little gifts

Judy


Monday, July 11, 2011

Little Tissue Holder - link to tutorial

My readers have been requesting that I give a tutorial on the little tissue holders that were featured in these two blog posts.

http://cathcarts.blogspot.com/2011/07/breast-cancer-drain-bags.html
http://cathcarts.blogspot.com/2011/07/bonbons-for-cause.html

I have been procrastinating about this, as it was not my pattern to share, but as luck would have it, we have found the designer.

The very talented Clare Bower from Clare's Craftroom - here is the link to her instructions.

The only changes I make are to use three pieces of fabric, cut 8" x 5", placed on top of each other, and treat as one - this is to give stability to the holder.  Good opportunity to use scraps of fabric as the middle two are not seen.

To save time & money, I usually just sew the 1" folds down with a decorative stitch, although my friend Sonia does sew ribbon on at this stage.

Any questions / problems, just ask and don't forget to go across to Clare's Blog and say thanks ...

Judy